Elliott Wave Structure
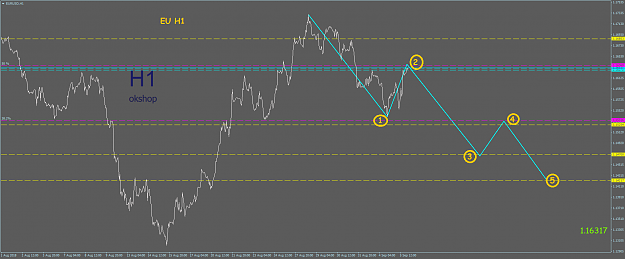
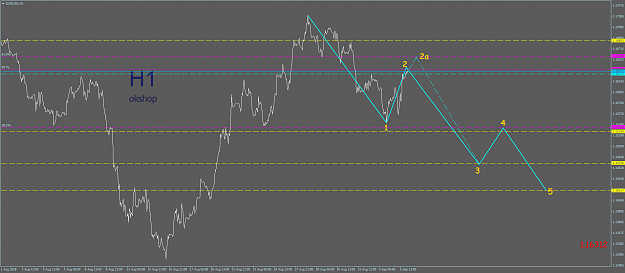
Technically, the Elliott wave structure is separated into two. We have the five-wave and the three-wave structure. The first phase which is the five wave structure is categorized as the impulsive or motive phase while the three wave structure is categorized as the corrective phase.
Moreover, the impulsive wave structure always align with the prevailing trend while the corrective wave aligns with the retracement of that move and it moves against the trend. The impulse wave takes on a 5-wave sequence while the corrective wave takes on a 3-wave sequence.
Characteristics Of Each Wave
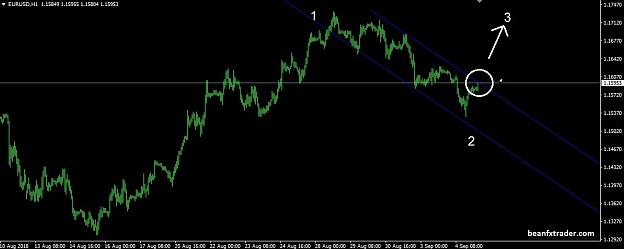
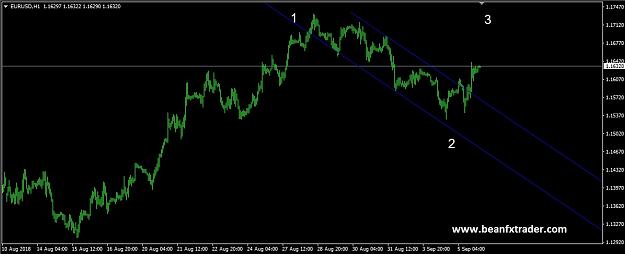
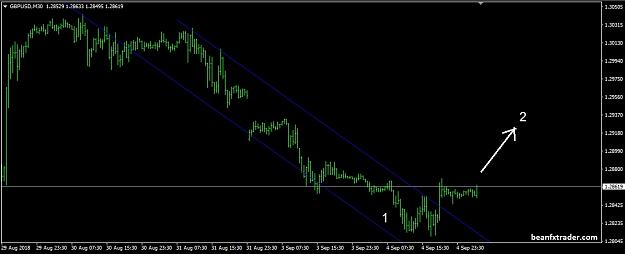
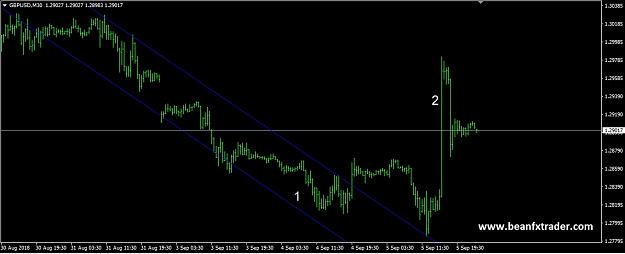
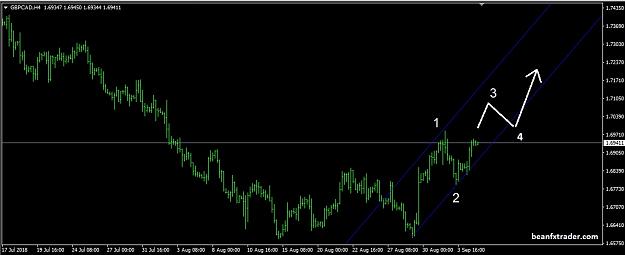
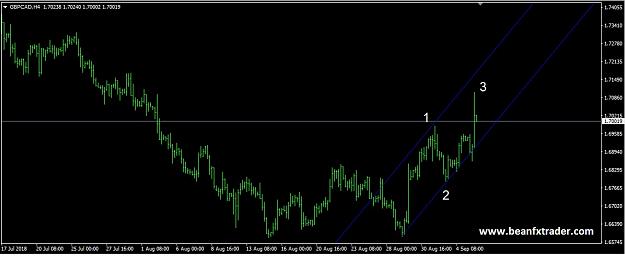
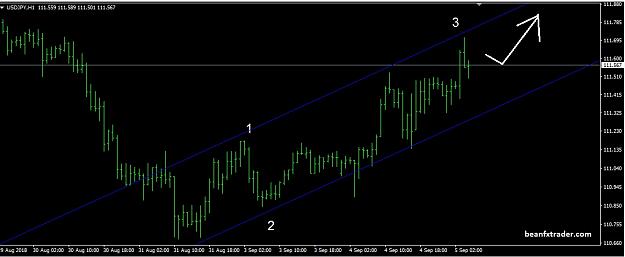
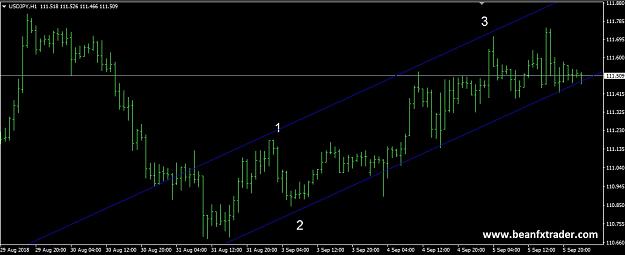
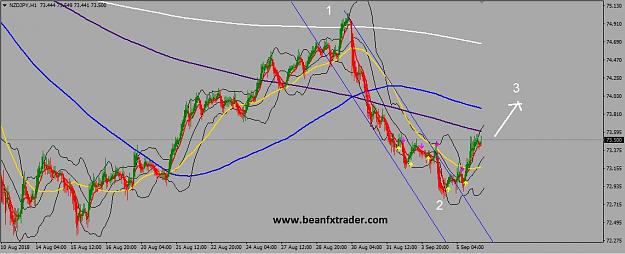
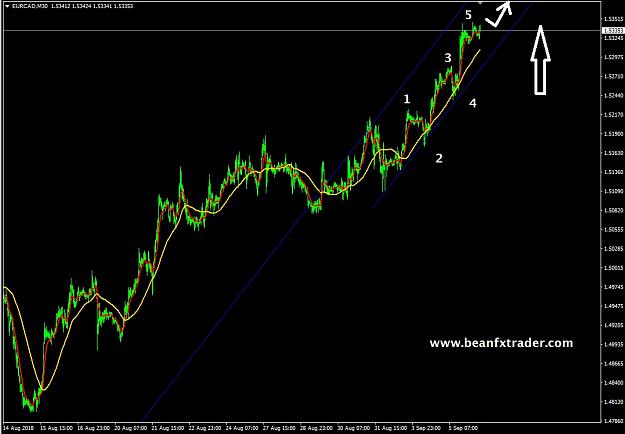
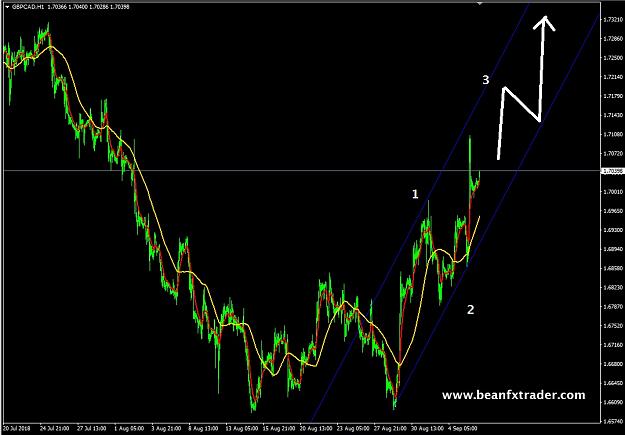
1. Wave 1: This wave mostly go unnoticed at the inception of the wave.
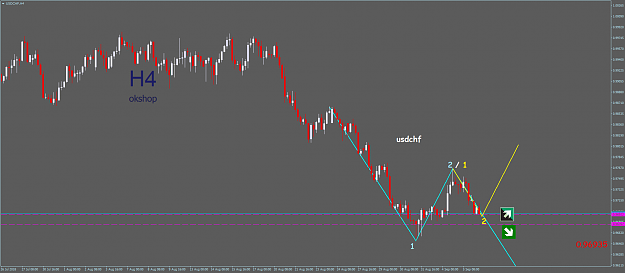
2. Wave 2: It corrects/reverses/retrace wave 1. Wave 2 never extends beyond the starting point of wave 1. Prices also do not retrace beyond 61.8% Fibonacci level. It never retraces beyond 100% of wave 1. Most common retracement point for wave 2 is at the 50% fibonacci level.
3. Wave 3: Here is the largest and the most powerful wave amongst the three impulse waves. Wave 1 or 5 can be longer than wave 3, but both waves 1 and 5 cannot be longer than wave 3 at the same time.
4. Wave 4: It corrects wave 3. Wave 4 usually retraces less than 38.2% of wave three. It can never overlap wave 1. The low of wave 4 cannot drop below the high of wave 1. (https://www.beanfxtrader.com/elliott-wave-principle/)
5. Wave 5: This wave is the last wave in the direction of the market trend. It is used to identify indicator divergence.
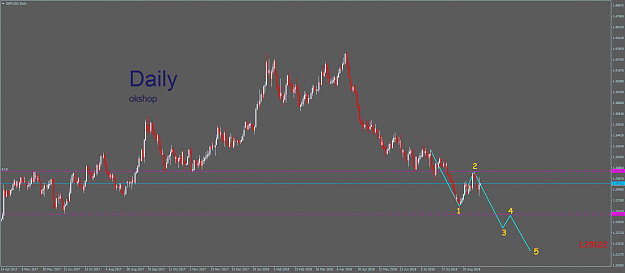
6. Wave A: It is an impulsive wave and it is also a corrective wave for wave 5.
7. Wave B: This is a corrective wave for wave A.
8. Wave C: This wave is an impulsive wave and it is also a corrective wave for wave B.
9. Wave A, B and C represents the trend continuation for wave 1 to 5.
How To Apply Elliott Wave To Trading
-Loading the Heiken Ashi indicator on your MT4 chart to filter noise in price movement.
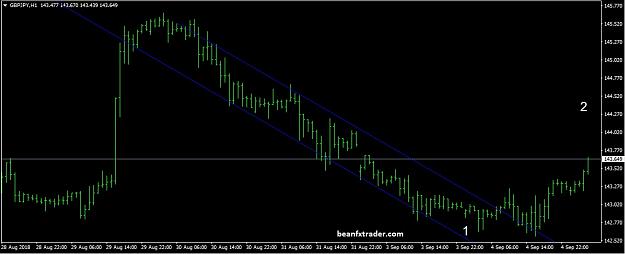
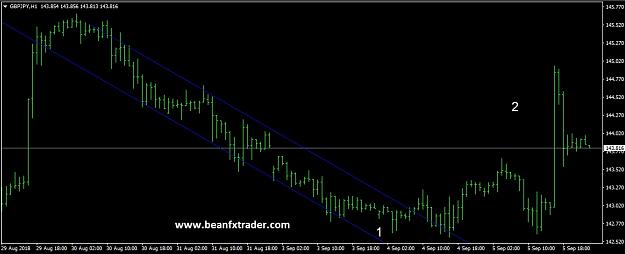
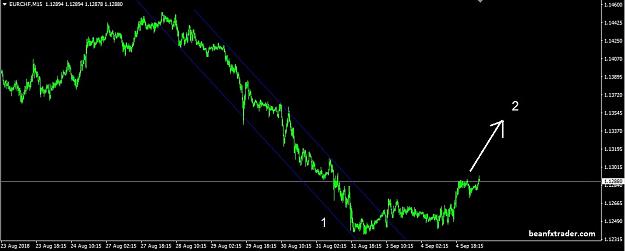
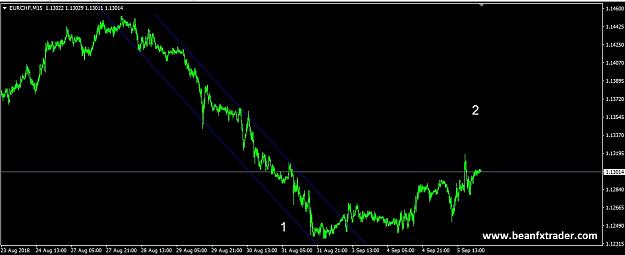
-Looking out for a good entry point for your wave count, especially when price appears to have bottomed out or is at the peak is important.
-If you enter your trade at wave 2, then placing your stop-loss at an area beyond 100% of wave 1 is key (note that your wave count is wrong if wave 2 extends its retracement beyond 100% of wave 1).
-If you enter your trade at wave 4, then placing your stop-loss at an area beyond 38,2% of wave 3 is vital (note that your wave count is wrong if wave 4 extends its retracement excessively beyond 38.2% of wave 1).
-Wave 3 is usually longer than wave 1, and entering your trade at wave 2 is most ideal.
Technically, the Elliott wave structure is separated into two. We have the five-wave and the three-wave structure. The first phase which is the five wave structure is categorized as the impulsive or motive phase while the three wave structure is categorized as the corrective phase.
Moreover, the impulsive wave structure always align with the prevailing trend while the corrective wave aligns with the retracement of that move and it moves against the trend. The impulse wave takes on a 5-wave sequence while the corrective wave takes on a 3-wave sequence.
Characteristics Of Each Wave
1. Wave 1: This wave mostly go unnoticed at the inception of the wave.
2. Wave 2: It corrects/reverses/retrace wave 1. Wave 2 never extends beyond the starting point of wave 1. Prices also do not retrace beyond 61.8% Fibonacci level. It never retraces beyond 100% of wave 1. Most common retracement point for wave 2 is at the 50% fibonacci level.
3. Wave 3: Here is the largest and the most powerful wave amongst the three impulse waves. Wave 1 or 5 can be longer than wave 3, but both waves 1 and 5 cannot be longer than wave 3 at the same time.
4. Wave 4: It corrects wave 3. Wave 4 usually retraces less than 38.2% of wave three. It can never overlap wave 1. The low of wave 4 cannot drop below the high of wave 1. (https://www.beanfxtrader.com/elliott-wave-principle/)
5. Wave 5: This wave is the last wave in the direction of the market trend. It is used to identify indicator divergence.
6. Wave A: It is an impulsive wave and it is also a corrective wave for wave 5.
7. Wave B: This is a corrective wave for wave A.
8. Wave C: This wave is an impulsive wave and it is also a corrective wave for wave B.
9. Wave A, B and C represents the trend continuation for wave 1 to 5.
How To Apply Elliott Wave To Trading
-Loading the Heiken Ashi indicator on your MT4 chart to filter noise in price movement.
-Looking out for a good entry point for your wave count, especially when price appears to have bottomed out or is at the peak is important.
-If you enter your trade at wave 2, then placing your stop-loss at an area beyond 100% of wave 1 is key (note that your wave count is wrong if wave 2 extends its retracement beyond 100% of wave 1).
-If you enter your trade at wave 4, then placing your stop-loss at an area beyond 38,2% of wave 3 is vital (note that your wave count is wrong if wave 4 extends its retracement excessively beyond 38.2% of wave 1).
-Wave 3 is usually longer than wave 1, and entering your trade at wave 2 is most ideal.